Upgrading My Home Network
With Spring Break providing some much-needed downtime, I was able to complete (or at least get working) a project that I had been wanting to tackle for a few months now. That project was a complete overhaul of my home network, which had previously used the all-in-one Router/Switch/Access Point that was provided by my ISP.
 Spectrum Wave 2
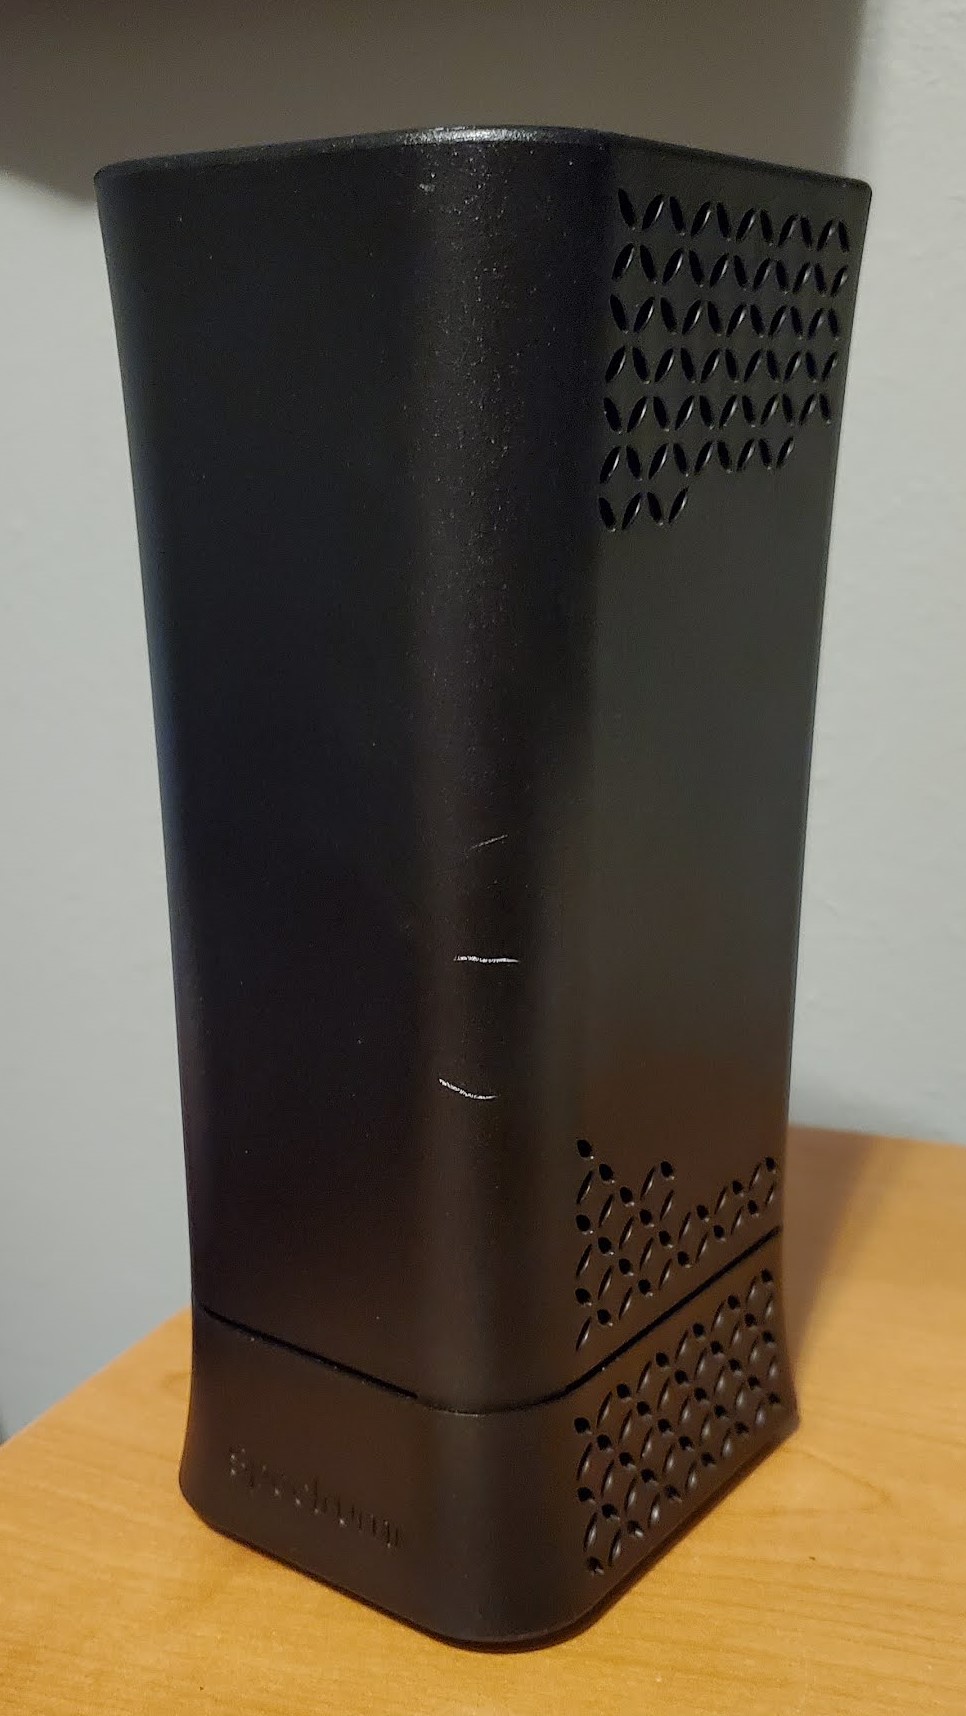
The router in question is an Arris/Askey RAC2V1A, also known as the Spectrum Wave 2. All things considered, it’s a pretty good ISP offering. It’s not an eero mesh system like what MetroNet provides, but it works well. Wi-Fi performance was solid all over the house, even with it being in my bedroom in a far corner. But it just didn’t give me the amount of control over my network that I wanted. I had a few main requirements and goals that I wanted to achieve.
What I Wanted
VLAN Support
With the amount of devices that a household has in 2022, I wanted to better segment my network because having clients, servers, and network infrastructure all on the
192.168.1.0/24subnet was not going to work. I wanted to have different networks for IoT devices, WFH devices, trusted devices (my servers and desktop), and client devices.Greater Network Management Capabilities
I wanted to be able to have more control over the flow of traffic across the network. A major part of this was wanting to prevent IoT devices from snooping around. Additionally, I was looking to have the ability to easily get more information about devices connected to my network. The Spectrum router displayed the IP address, MAC address, and the hostname of the device. If I wanted to determine the manufacturer, I would have to google the MAC address.
10 Gigabit LAN Capability
With the price of 10 gigabit working gear coming down and ISPs like AT&T starting to offer speeds above 1 gigabit, I wanted to have room to upgrade my network to be capable of running my LAN at 10 gigabit as well as having multi-gigabit WAN.
Reasonable Cost and Noise
I am a college student after all, and with gas being around $4.25 a gallon in Angola and over $4 in Toledo, I needed to keep the costs of this project under control. Fortunately, I got lucky in this regard. As for noise, the “network clost” at my house is my bedroom, so having components that sound like a jet engine taking off were a non-starter. I’d like to be able to sleep when I come home from school!
What I Chose
Routing/Firewall
For my routing and firewall, I chose to use OPNsense, an open-source firewall and routing distro based on FreeBSD. I had also considered pfSense, but Netgate’s anti-competitive practices left a bad taste in my mouth. Additionally, I was drawn to OPNsense’s more frequent updates, native WireGuard support, and greater commitment to open-source.
As for the hardware, I was planning on doing virtualization up until the last minute. When I got back home, I saw a post on /r/hardwareswap that was giving away a large quantity of ATX cases. I had been looking for another case to set up a virtualization server anyways, so I messaged the OP. When I went to pick up the case, I left with the case, a Xeon E5-2603 v3, a Mellanox ConnectX-2 10Gb NIC, a CPU tower cooler, a 2 TB hard drive, and a 1U server all for $20. This server became my firewall, behold Cadmium!
![Cadmium]() Cadmium in its natural environment.
Cadmium in its natural environment.Cadmium is a Supermicro SC512-200B server with the following specs:
- Intel Xeon E5504
- Supermicro X8STi
- 4 GB RAM
- 160 GB HDD
- 2x Intel 82574L Gigabit NIC
I installed the 10Gb NIC in the PCIe slot, giving me 10 gigabit capabilities in the future. This thing absolutely did NOT meet my noise requirement. When I was configuring it, I disconnected the blower fan and used a 140mm fan that I got with an AIO water cooler years ago. That made it much more manageable to be next to. It has since been moved to the basement, where it can be as loud as it wants!
Switching
For switching, I wanted to give myself room to grow. The four ports on the Spectrum router were not enough for what I want to do with my network. While I have more experience with configuring Cisco switches (thanks Professor Hamman!), the Cisco options that I considered were either not 10-gig capable out of the box, would be too loud in a home environment, or too expensive. Then I found out about MikroTik. I had a few different options I was considering, namely the CSS610-8G-2S+IN and the CRS326-24G-2S+IN, I settled on the CSS326-24G-2S+RM.
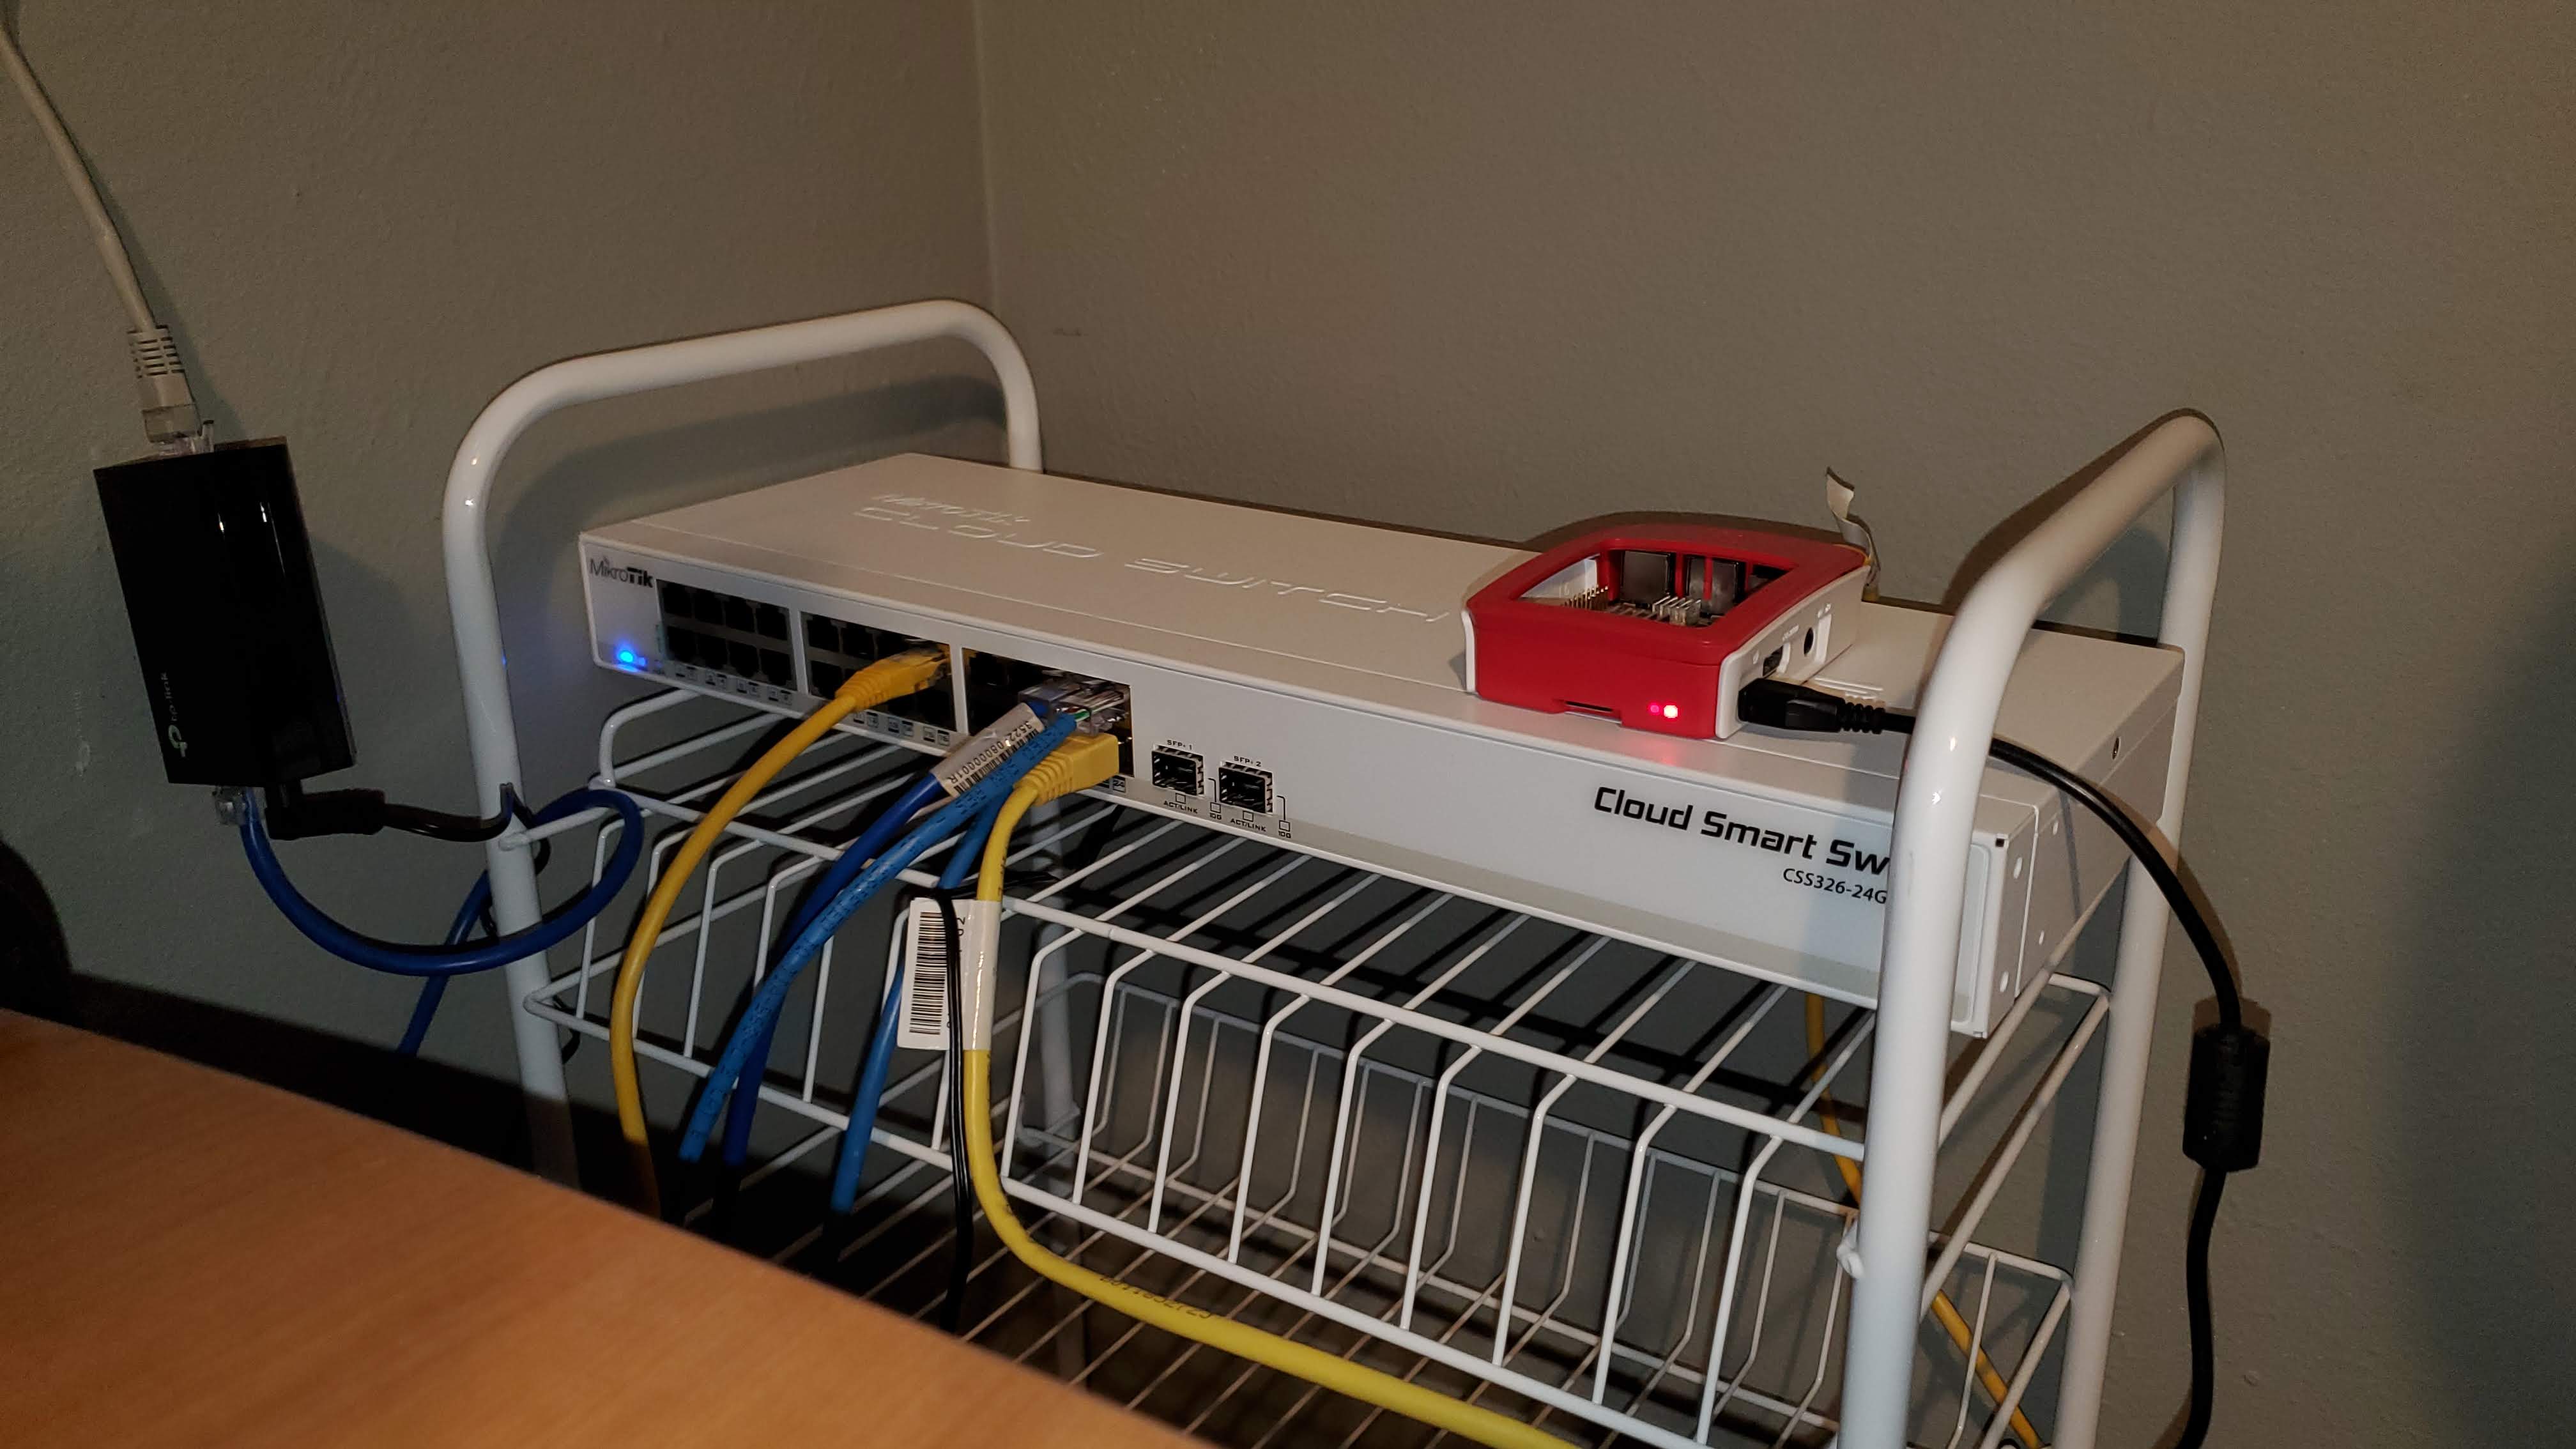
![MikroTik switch]() MikroTik CSS326 switch and Raspberry Pi 3 that runs my UniFi controller
MikroTik CSS326 switch and Raspberry Pi 3 that runs my UniFi controllerI chose the CSS326 because of its port count, 10 gigabit capability, passive cooling, and most of all, price. I paid $170 on Amazon from a MikroTik-authorized distributor and the price-to-performance proposition was too good to pass up.
Access Point
This was another category where things just fell into place. My mother’s employer moved offices awhile back and allowed the employees to take furniture and office equipment that wasn’t being moved home with them. I went to the office with her one night to help her move stuff to her car and found a UniFi AC Pro access point on a desk. I asked if I could take it and was given the green light. This set the project into motion.
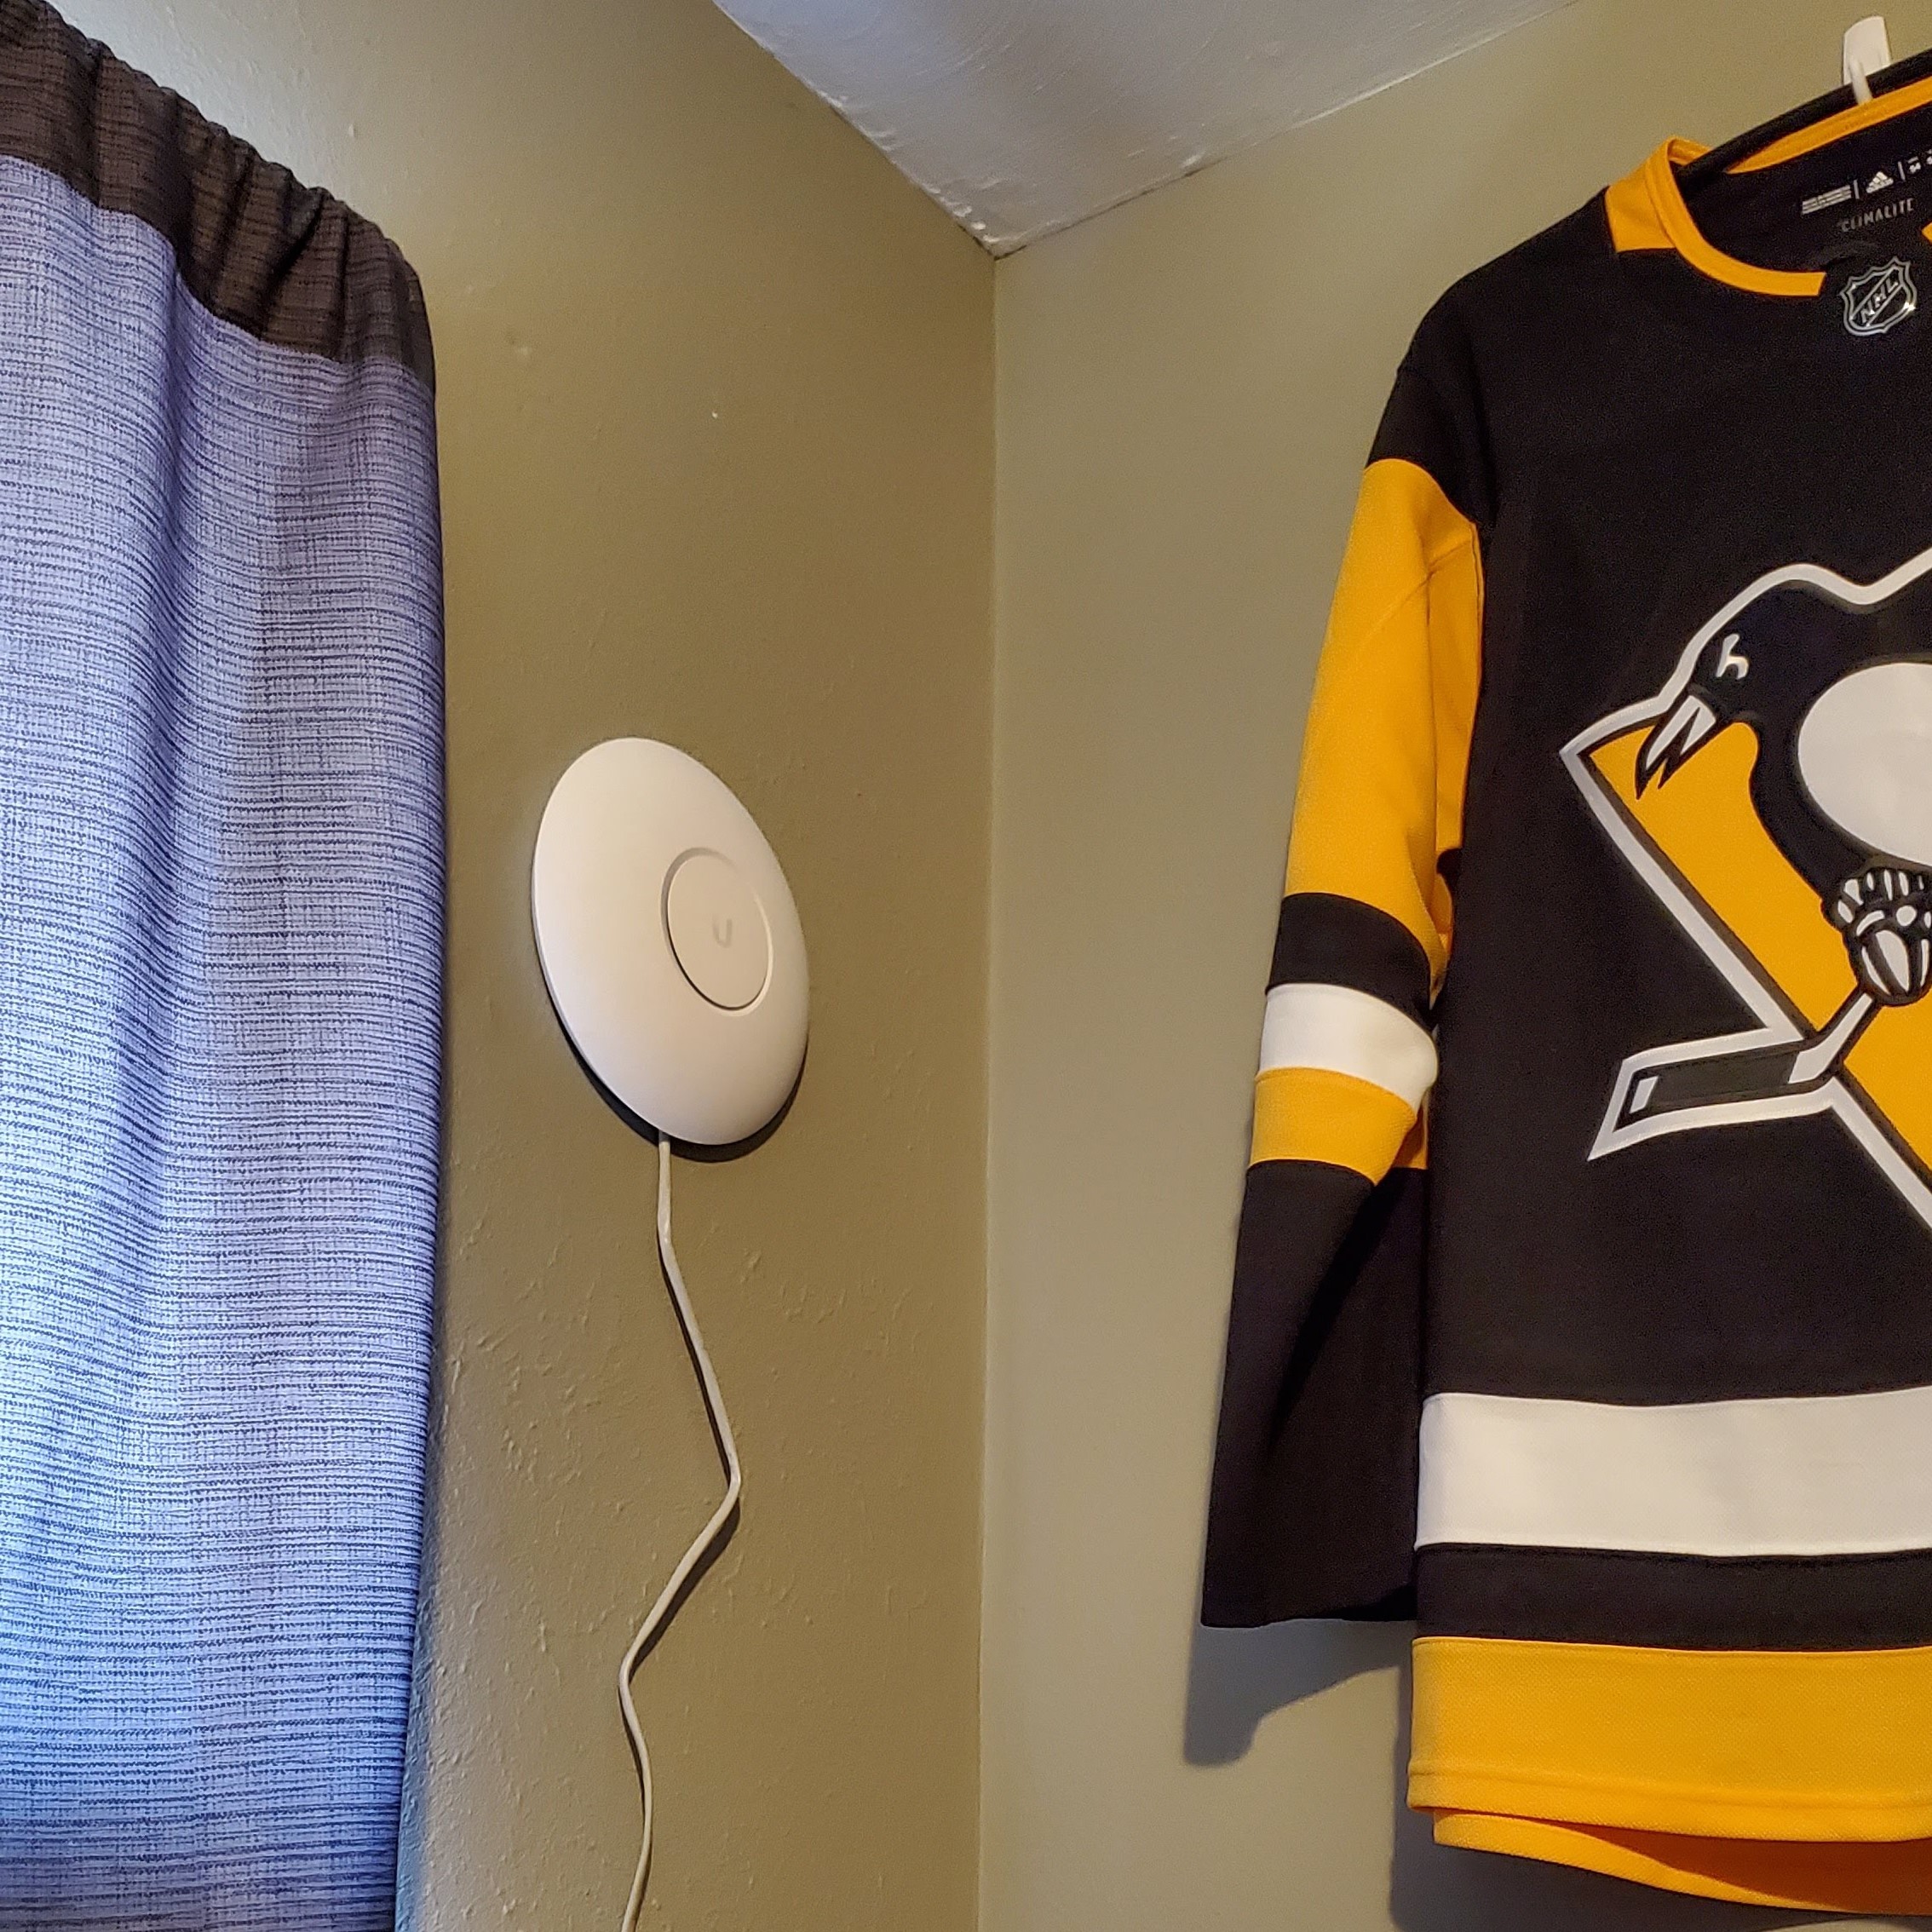
![UniFi AC Pro]() UniFi AC Pro mounted with velcro.
UniFi AC Pro mounted with velcro.

Setting it all up
Saturday/Sunday
After deciding to commit to the project on Saturday, I ordered the switch and a TP-Link PoE injector on Amazon. Thanks to Prime and living near multiple Amazon warehouses, they would be delivered the next day. I went and picked up the case, server, and NIC later that afternoon.
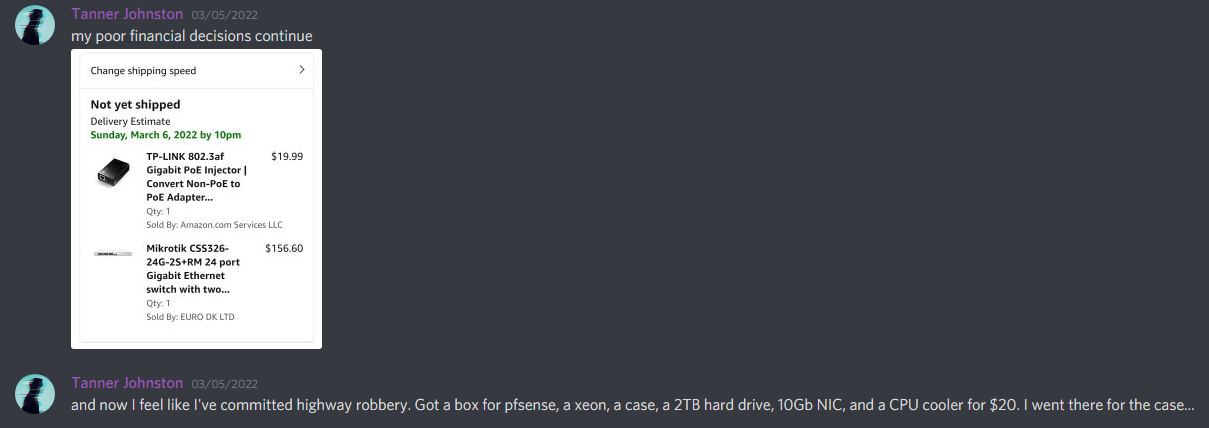 Announcing the project in the CSIT Department Discord server
I spent Saturday and Sunday finalizing my plans for the network (what subnets and VLANs I wanted, what IDs they would have, etc) and getting to know my new equipment and OPNsense. Since my mother had some work that needed to get done, the earliest that I could take down the network and begin the configuration was Monday morning.
Monday
Monday began by disconnecting the modem from the ISP router and connecting it to the firewall. The first issue that I ran into was the firewall not being able to get a WAN IP address with DHCP. It turns out that when the MAC address of the device connected to the modem changes, the modem must be power cycled. Once I took care of that, I was able to connect to the internet.
In order to get into the web UI, I connected the firewall and my desktop to the switch. I created my VLANs and their interfaces in OPNsense and assigned them to one of the onboard gigabit NICs since I currently do not have SFP+ transceivers for the firewall and switch.
For my topology, I opted to use router-on-a-stick. I would have preferred to use switch virtual interfaces since it’s what I have more experience in configuring, but I don’t have a layer 3 switch that supports it.
My configuration currently has four VLANs configured: Management on VLAN 5, Trusted devices and Servers on VLAN 6, IoT devices on VLAN 7, and Client/Guest devices on VLAN 8.
 My VLANs in OPNsense
Each of these VLANs has a subnet with a third octet that matches the VLAN ID.
| Name | VLAN | Subnet |
|---|---|---|
| Native | 1 | 192.168.1.0/24 |
| Management | 5 | 192.168.5.0/24 |
| Trusted | 6 | 192.168.6.0/24 |
| IoT | 7 | 192.168.7.0/24 |
| Clients | 5 | 192.168.8.0/24 |
After creating firewall rules to restrict devices on the IoT and Client networks from communicating with one another, I moved on to my Wi-Fi. I initially did not create the management VLAN, and because of that, I had issues with my configuration at this point. I was unable to connect my laptop to the trusted wireless network that I had created but the regular client network and the IoT network were working as expected. I got the system back to a semi-working state and went to bed.
Tuesday
My goals for Tuesday were to move the firewall from my bedroom to the basement so I could reinstall the top panel and to get the Wi-Fi issue figured out. In order to do this, I had to cut and reterminate the coaxial cable that connects the modem to the ISP drop outside the house. This was because the RG-6 connector was too large to fit through the hole that was drilled through my floor into the basement. Since an RG-6 connector would not fit through the hole in my floor, neither would a pre-made ethernet cable. Two trips to Menard’s, $75, and about 45 minutes of RJ45-induced frustration later, I had working (albeit somewhat jank) coax and ethernet cables. I then moved the firewall downstairs and reinstalled the stock blower fan. Now I can sleep in peace again!
I also solved my access point woes. As it turns out, the issue was that I had my UniFi controller installed to a docker container on one of my servers, Krypton, which is in the 192.168.6.0/24 subnet. I initially attempted to move it to the 192.168.1.0/24 subnet to no avail. After wiping the configs on both the firewall and switch, as well as installing the UniFi controller on my Raspberry Pi 3, I configured my UniFi AP and controller to use VLAN 5 and the 192.168.5.0/24 subnet for management.
Getting everything configured on the switch side was somewhat daunting since I’m more used to the Cisco command-line interface than the MikroTik SwOS web UI. Fortunately, this blog post by Michael Schnerring where he configured a similar setup made things much clearer to me!
The final port VLAN configuration in SwOS looked like this:
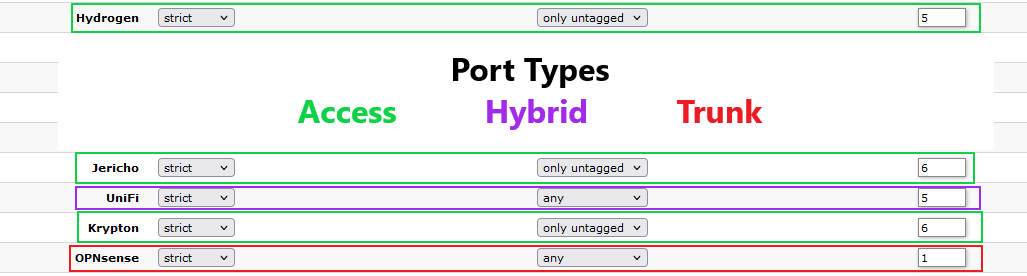 Ports and their VLAN settings in SwOS
After getting all of the port settings correct in the switch, I was able to adopt my UniFi AC Pro access point and create my VLAN-only networks and my SSIDs. I chose to make 1 SSID broadcasted with the other 2 not broadcasted. The broadcasted SSID is attached to the Clients VLAN, while the two hidden SSIDs correspond to the Trusted and IoT VLANs respectively.
Conclusion
With everything working properly, the project is complete! For now… I will eventually get a 10 gigabit link set up between my switch and firewall as well as install a UniFi BeaconHD in my living room to further improve the Wi-Fi on that side of the house. But my setup is significantly improved compared to what I had with the Spectrum router.
As for how much I spent, I think I did a decent job in this regard:
| Category | Item | Price |
|---|---|---|
| Firewall | Supermicro SC512-200B | $10* |
| Switch | MikroTik CSS326-24G-2S+RM | $156.60 |
| PoE Injector | TP-Link 48V PoE Injector | $19.99 |
| Access Point | Ubiquiti UniFi AC Pro | $0 |
| Network Card | Mellanox ConnectX-2 | $10* |
| Cable | 100ft Reel of CAT6 | $29.37 |
| Cable Parts | LeGrand Modular RJ45 Ends (10pk) | $6.20 |
| Cable Parts | RCA Twist-on RG-6 Ends (10pk) | $4.29 |
| Tool | Datashark RJ45/RJ11 Crimping Tool | $19.97 |
| Total | $256.42 |
*Firewall and NIC were purchased alongside non-project equipment for $20 total.
I got lucky with how I was able to get some of these parts, like the firewall and access point, but the costs of the parts necessary to move the firewall downstairs offset that to an extent. Looking on the bright side though, I still have about 70 feet of that reel of CAT6 cable, some RJ45 ends, and a decent crimping/stripping tool that I can use in the future.
Overall, this was a great learning experience for me. This project gave me exposure to technologies that I hadn’t used before, more hands-on experience in the design and implementation of a physical network, and most importantly, something to do over Spring Break! Is this the best setup out there? No, but that was not my goal. My goal was to improve on what I had, give myself room to grow, and not break the bank in doing so. And I think this setup has met those goals quite nicely.
Stay tuned for future updates to this project!